
The decision to implement digital pathology is easier than the implementation itself. Labs that approach the transition without a structured plan often find themselves managing dual workflows longer than expected, dealing with staff resistance that could have been anticipated, or discovering infrastructure gaps after contracts are signed.
This guide covers the full implementation journey: from initial assessment through daily clinical use. It draws on what labs that have successfully made the transition have learned, and what Lumea has observed across hundreds of deployments. No two implementations are identical, but the same planning principles apply regardless of lab size, specialty, or starting point.
How long does digital pathology implementation take? A typical deployment, including software setup, LIS integration, staff training, and validation for primary diagnosis, runs between three and nine months from contract to go-live. Labs that start with a focused scope, such as a single specimen type or a single site, can move faster. The sections below explain why.
In this guide
- Why Implementations Stall
- Phase 1: Assess and Plan
- Phase 2: Select Your Technology
- Phase 3: Prepare for Implementation
- Phase 4: Validate and Pilot
- Phase 5: Go-Live and Optimization
- Phase 6: Integration into Daily Practice
- Frequently Asked Questions
Why Implementations Stall: The Dusty Scanner Problem
Plenty of labs have bought a scanner. Far fewer use it every day. “We’ll go visit groups that have a scanner, and it is full of dust in the corner,” Lumea CEO James Thackeray said in a Pathology News webinar. “It’s been used three times for some tumor board and has not been used in clinical diagnosis or primary diagnosis.”
The usual explanation is budget or resistance to change. More often, the problem is that the digital workflow is slower than the microscope it’s meant to replace. Pathologists are very efficient at the workflow they have, and they won’t give it up for one that costs them time. As Lumea Chief Revenue Officer Chelsea Sowards put it, practices “have a scanner, and it’s not being used… they’ve just struggled to get the workflow in place.”
Every phase below is built to avoid that outcome: the goal isn’t to install digital pathology, it’s to make it the way your pathologists prefer to work.
Phase 1: Assess and Plan
Evaluate Your Current Workflow
Before evaluating vendors or technology, understand where your current workflow has the most friction. The most common pain points that drive labs toward digital pathology are: consultation delays caused by geographic distance, slow turnaround times on ancillary and molecular test ordering, inefficient slide routing and sorting, difficulty covering multiple sites with existing pathologist capacity, and the administrative burden of physical slide management and storage.
Identifying your specific pain points shapes everything that follows, including which technology components you prioritize, which vendor capabilities matter most, and how you’ll measure success after go-live.
Define Your Objectives
Start with four questions, which pathologist Richard Lash, MD, recommends answering before anything else: What problem is digital pathology meant to solve for us? Is the benefit material and measurable? How will clinics, the lab and pathologists each be affected, positively and negatively? And which hardware and software components will we need, and will they work together?
Vague goals produce vague outcomes. Before engaging vendors, define what success looks like in concrete terms. Examples of well-defined objectives include reducing average case turnaround time by 30%, enabling primary diagnosis from two remote sites, integrating molecular test ordering into the pathologist’s diagnostic workflow, or achieving 100% digital primary diagnosis for prostate core biopsies within 12 months.
Quantified objectives help you evaluate vendor proposals objectively, build the ROI case for leadership and finance, and measure actual outcomes after implementation.
Assess Your Resources
Going digital is an investment in money, time, and people. Before planning a timeline, honestly evaluate:
Budget: Account for hardware (scanners, if not already in place), software licensing, IT infrastructure upgrades, training, validation, and ongoing maintenance. Include a contingency for the reduced productivity that accompanies any major workflow change during the transition period.
Staffing: Identify who will lead the implementation internally. This person needs the authority to make workflow decisions, the time to manage vendor relationships, and the credibility to drive adoption among lab staff and pathologists. Implementations without a clear internal champion consistently struggle.
Timeline: Balance speed of execution against operational disruption. A phased rollout that starts with a single specimen type or a single site is slower to full deployment but significantly lower risk than a simultaneous full-lab transition.
Engage Stakeholders Early
The most common reason digital pathology implementations stall is not technology — it’s people. Pathologists who weren’t involved in the selection process feel imposed upon. Lab staff who weren’t consulted on workflow changes resist adoption. IT teams who were brought in late discover infrastructure gaps that delay go-live.
Involve pathologists, lab personnel, IT staff, administrators, and finance from the beginning. Their input improves the implementation plan and their early involvement creates the sense of ownership that drives adoption. When communicating the rationale for the change, explain the why clearly rather than simply announcing imminent changes. People adopt new workflows more readily when they understand what problem the change is solving.
Change Management Is Not Optional
Of all the factors that determine whether a digital pathology implementation succeeds or stalls, change management is the most consistently underestimated. Dr. Syed Hoda, Director of Digital Pathology at NYU Langone and the pathologist who led NYU’s full clinical digital transformation, learned this firsthand. His institution brought in a dedicated change management expert who helped organize town halls, small group sessions, polling, and a full retreat day before a single scanner went live — all designed to let pathologists voice concerns before go-live rather than after.
“There’s a lot of resistance built into pathologists,” Dr. Hoda shared on his episode of the PathPulse podcast. “There’s change management involved, which, if you’re in a company, you understand what that means. Telling doctors what to do and how to do their work is like one of the great challenges of healthcare.”
His change management expert reframed what a difficult meeting actually meant: “People were complaining, and you want that. You want to hear what people are complaining about. If you just go through the silent world of thinking ‘I’m the leader and I’ll make this happen,’ what’s going to happen is it’s going to go live and then they’re going to complain about it. And then you never address their complaints.”
The cost of skipping this step is real. Dr. Hoda recounted speaking with a private lab that set a hard deadline for going fully digital without adequate change management preparation. Nearly half their pathologists left before the deadline. In a specialty already facing workforce shortages, that outcome is not recoverable.
The practical implication for labs planning an implementation: budget time and resources for change management the same way you budget for hardware and software. Invite outside speakers. Hold information sessions before any purchase decisions are made. Create structured channels for staff to voice concerns. The goal is to make the transition feel predictable rather than imposed — and the difference between those two experiences determines whether your pathologists adopt the system or resist it.
Phase 2: Select Your Technology
Key Components to Evaluate
A complete digital pathology implementation involves several technology components that need to work together:
Whole Slide Image (WSI) Scanner: The scanner converts glass slides into digital images. Key evaluation criteria are throughput (slides per hour), image quality, reliability, scanner footprint, and format compatibility with your chosen software. Ensure you have a redundancy plan — a single scanner failure in a fully digital workflow is a significant disruption.
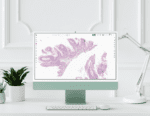 Image Management System (IMS) and Viewer: This is where pathologists do their diagnostic work. Evaluate rendering speed (lag kills adoption), workflow customization, AI integration capabilities, mobile and remote access, and LIS integration depth. Ask for a live demonstration on your own cases, not a vendor-controlled demo with optimized slides.
Watch for the “cockpit”: a workstation crowded with separate screens for the viewer, the LIS, case management and AI tools. Every switch between applications costs time, and that friction is what sends pathologists back to the microscope. The goal is one platform, on one screen, for the whole diagnostic process. Also ask whether each software component is a research-use-only (RUO) or a diagnostic-ready version.
LIS Integration: How deeply the digital pathology platform integrates with your Laboratory Information System is one of the most important and most underestimated factors in a successful implementation. A shallow integration, where the viewer is essentially a link that opens a separate application, creates a parallel workflow that adds friction rather than removing it. A deep bidirectional integration means case management, image routing, AI results, molecular test ordering, and reporting all happen in one workspace.
Pre-Analytical Tissue-Handling Technology: Digital pathology’s benefits are limited by the quality of the specimen that reaches the scanner. Tissue-handling devices that standardize collection, reduce fragmentation, and preserve anatomic orientation improve the downstream diagnostic value of every scan. These tools are often overlooked in implementation planning but consistently rank among the highest-ROI components for labs that adopt them.
AI Tools: Most modern digital pathology platforms support third-party AI integration. Evaluate whether the platform you’re considering has an open ecosystem that lets you choose the best AI for each application, or whether it locks you into proprietary AI that may not serve all your specialty needs.
Before adding any AI tool, confirm three things: it’s validated for your intended use, it fits your case mix, and it’s cost-effective. The pathologist stays the “human in the loop,” reviewing AI output and deciding when to rely on it, so involve your pathologists in choosing and validating these tools.
Evaluate Vendors Carefully
Request demonstrations of actual, production-ready products — not videos of idealized scenarios or software still in development. Ask to speak with reference labs that have completed implementation, specifically users at the bench and diagnostic level rather than only administrators or executives. Visiting a live lab using the system you’re considering is invaluable.
Check FDA clearance status for any components used for primary diagnosis. Lumea’s Viewer+ holds FDA 510(k) clearance for primary clinical diagnosis and CE marking under IVDR for clinical use in Europe.
Ask vendors explicitly about implementation support: who manages the process, what the typical timeline is, and what happens when things don’t go according to plan. A vendor’s implementation track record matters as much as their product features.
Budget Realistically
Build your budget around five cost categories:
- Hardware: Scanner(s), server infrastructure (if on-premise storage), workstations, monitors
- Software: IMS/viewer licensing, LIS integration fees, AI tool subscriptions
- Implementation: Vendor professional services, IT staff time, workflow design consulting
- Validation: Pathologist and staff time for the validation study, plus quality assurance testing
- Ongoing: Storage costs, software maintenance, support contracts, training for new staff
Expect reduced productivity during the transition period. Build that cost into your ROI model rather than treating go-live as the moment benefits begin. Plan for a productivity dip that lasts at least a few weeks if not several months.
Phase 3: Prepare for Implementation
Infrastructure Readiness
Digital pathology is infrastructure-intensive. Address these requirements before any software is installed:
Network bandwidth: Whole slide images are very large files, often a gigabyte or more per slide. Rendering them at diagnostic quality requires sufficient bandwidth between your scanner, storage, and viewer workstations. Inadequate network infrastructure is one of the most common causes of poor adoption — pathologists who experience loading delays revert to glass.
Storage capacity: Estimate storage from a test batch of your own slides on your chosen scanner, then model your needs over a three- to five-year horizon, not just one year. Determine your cloud vs. on-premise strategy and ensure your chosen approach is HIPAA compliant before storing any patient data. You can control storage costs by tiering access. Keep recent cases instantly available, for example for four to six weeks, and move older cases to lower-cost storage that may take up to a day to retrieve.
Physical space: A WSI scanner requires a stable surface free from vibration, adequate power, and ideally battery backup to prevent scan interruption during power fluctuations. These are physical requirements that labs sometimes overlook until installation day.
IT security: Ensure role-based access controls, encrypted data transmission, and a documented disaster recovery plan are in place before go-live. These are HIPAA requirements, not optional. Bring IT in early, especially if images or reports will move outside your network: remote access usually means a VPN or equivalent, and your quality system needs written procedures for it. Smaller labs without in-house security staff can hire specialists to test their setup before go-live.
Workflow Mapping
Map your current workflow in detail, then design the digital workflow alongside it. Identify every step where the process changes and document the new standard operating procedure for each. The places where digital pathology creates new steps, such as scanning, QC review of scanned images, and data migration, need to be staffed and timed. Don’t assume the scanner runs itself.
Develop contingency procedures for the inevitable moments when technology fails: what happens if the scanner goes down, if the network is slow, or if the software is unavailable? Labs that pre-plan for downtime handle it with minimal disruption. Labs that don’t plan for it face significant stress and patient care delays.
Plan for Remote Sign-Out
Under current CMS policy, pathologists can review digital slides and data remotely, including from home, under the primary lab’s CLIA certificate as long as: the primary lab holds a current CLIA certificate; the remote work falls within the specialties on that certificate; the lab director remains responsible for all remote work; and each report indicates where the review was done.
Two exceptions matter. Glass slides can’t be read remotely under the primary lab’s certificate, and since March 23, 2026, remote review of digital cytology slides requires a separate CLIA certificate for the remote location. State licensure rules also apply, so check the requirements for every state involved.
Regulations governing remote sign-out change often, and this guide isn’t legal or regulatory advice. Before setting up remote review, check the latest CLIA guidance from CMS (cms.gov), your accrediting organization such as CAP (cap.org), and the licensing rules in each state involved.
Staff Training
Train every user type, including lab technicians, pathologists, administrative staff, and IT support, before go-live. Don’t limit training to a single session — plan for initial training, a follow-up session after the first week of use, and ongoing access to support resources.
For pathologists specifically, the validation phase described below will provide substantial hands-on experience with the system before they’re using it for primary diagnosis. Take advantage of this period to identify individual learning curves and address concerns before they become resistance.
NYU Langone’s implementation deliberately sequenced capability adoption — proficiency in daily digital workflow before AI, AI before remote sign-out. Defining clear competency milestones before introducing new capabilities reduces cognitive overload and builds pathologist confidence progressively.
Phase 4: Validate and Pilot
Validating Your System for Primary Diagnosis
Every lab that uses digital pathology for clinical diagnosis should run its own validation study first. In the U.S., the lab operates under CLIA, and the College of American Pathologists (CAP) guideline sets out how to validate. Its three core recommendations:
- At least 60 cases for each application, such as H&E-stained sections, that reflect the range of specimens and diagnoses you see in routine practice, plus 20 more for each additional application, such as immunohistochemistry, that you’ll use.
- Same-pathologist comparison: each pathologist’s digital diagnoses are compared with their own glass diagnoses on the same cases. If concordance falls below 95%, the lab investigates and fixes the cause.
- A washout period of at least two weeks between reading the glass and digital versions of each case, with cases reviewed in random order.
This is a summary; see the full guideline for its complete recommendations.
Validate the whole system together: scanner, viewer, monitors and the LIS interface, even if they come from different manufacturers. If you use an FDA-cleared system exactly as cleared, the lab verifies that it performs as expected; if you combine components or modify a cleared system, the lab is validating a laboratory-developed test and the bar is higher.
Validation takes time, but it’s an investment that protects your lab and gives your pathologists real confidence in the system. Plan to repeat it when you add new applications or make significant changes, such as a new scanner or major software update. Lumea’s implementation team has developed streamlined validation protocols based on deployments across hundreds of labs and can guide you through the process.
This section summarizes published guidance for general information only. Lumea is not a regulatory or accrediting body, and requirements can change. Your laboratory director is responsible for your validation plan, so always work from the current CAP guideline, your accrediting organization’s checklist and CLIA requirements.
Pilot Program
Before full deployment, run a controlled pilot with a limited scope: one specimen type, one pathologist or group, one clinical partner. The goal is to identify workflow gaps, technology issues, and adoption barriers in a controlled environment before they affect your broader operation.
Engage a clinical partner who is willing to participate in the process openly, including providing honest feedback when things aren’t working. The best pilot feedback comes from users who feel safe saying what’s wrong, not just what’s right.
Gather structured feedback after the pilot, make documented adjustments, and communicate those adjustments to participants. Seeing their feedback acted on builds the trust that drives broader adoption.
Phase 5: Go-Live and Optimization
Phased Rollout
Implement in stages rather than switching the entire lab simultaneously. A typical sequence is: begin with a single specimen type (high-volume, standardized specimens such as prostate biopsies are a common starting point), expand to additional specimen types, add pathologists and sites, and finally move to 100% digital primary diagnosis across all workflows.
One common mistake is leading with the exciting features, like AI analytics, before pathologists are comfortable reading slides digitally. Start with primary diagnosis and give pathologists time to build muscle memory. Once the digital foundation is solid, AI tools are better received and pathologists can see them as support for their expertise rather than competition with it.
The phased approach manages risk, allows the team to build confidence progressively, and enables you to demonstrate ROI to leadership at each stage rather than waiting for full deployment.
Data Migration
If you’re transitioning from an existing digital system or migrating historical data, plan the migration carefully. Verify data integrity after migration before decommissioning the old system. Ensure all migrated cases are accessible and correctly associated with patient records in the new system. A limited rollout approach during migration reduces the risk of data issues affecting patient care.
Ongoing Communication
Maintain structured communication with all stakeholders throughout go-live and the weeks following. Weekly check-ins with the implementation champion, a clear channel for users to report issues, and visible responsiveness to problems reported all sustain the momentum that early adoption requires.
Phase 6: Integration and Daily Practice
Monitor and Measure
After go-live, track the metrics you defined in Phase 1. Are turnaround times improving? Is pathologist productivity recovering toward baseline? Are consultation times shorter? Are molecular test orders being completed appropriately?
Regular monitoring lets you identify problems early, demonstrate ROI to leadership, and make the data-driven case for additional investment in the platform over time.
Stay Current
Digital pathology is evolving rapidly. New AI tools, new scanner capabilities, and new regulatory guidance emerge regularly. Labs that stay connected through conferences, professional organizations, and vendor updates maintain the competitive advantage that drove the initial investment. Lumea’s annual Digital Diagnostic Summit is specifically designed for labs that want to stay at the forefront of what’s possible in digital pathology.
Regulation is moving too. In 2025, a federal court vacated FDA’s rule that would have regulated laboratory-developed tests as medical devices, and the FDA formally rescinded it that September, so labs validating their own digital workflows remain under CLIA oversight. CMS changed its remote cytology policy in 2026. Labs in Europe operate under the In Vitro Diagnostic Regulation (IVDR) and the EU AI Act. Assign someone to watch for changes like this.
The benefits of going fully digital extend beyond operational efficiency. Dr. Hoda described a transformation in how pathology is perceived at NYU Langone — more medical students, equal standing with radiology at tumor boards, and a specialty that no longer carries the perception of being slow to modernize. “It takes the lid off the potential cap that was kind of there,” he said. “Adopting a digital workflow means that we’re comfortable with moving into the future.”
Continuous Improvement
The implementation is complete, but the optimization isn’t. Solicit ongoing feedback from pathologists and lab staff. Review workflows periodically for new automation opportunities. Evaluate new AI integrations as they become available. The labs that see the greatest long-term return from digital pathology treat it as a continuously improving platform rather than a one-time installation.
Frequently Asked Questions
How long does digital pathology implementation take?
Most deployments take three to nine months from contract to go-live, including software setup, LIS integration, training and validation. Starting with one specimen type or one site is faster.
What equipment do I need to go digital?
Four things: a whole slide image scanner, image management and viewing software integrated with your LIS, diagnostic-grade workstations and monitors, and image storage. Tissue-handling technology is optional but improves the slides you digitize.
Does my lab need FDA clearance to use digital pathology?
FDA clearance applies to manufacturers’ products, not to labs. A lab can use an FDA-cleared system or validate its own combination of components under CLIA. Either way, the lab runs a validation study, following the CAP guideline, before using the system for primary diagnosis.
Can pathologists sign out cases from home?
Yes, for most digital slides, under current CMS policy, provided the work falls under the primary lab’s CLIA certificate and the report notes the remote location. Remote review of digital cytology slides now needs its own CLIA certificate. See Plan for Remote Sign-Out above.
Can we start small?
Yes, and most successful labs do. Begin with one specimen type, one site or one group of pathologists, prove it works, then expand.
Ready to Start?
The implementation journey is significant, but it’s navigable — and the labs that have completed it consistently describe it as one of the most impactful operational decisions they’ve made.
Lumea’s consulting services team has guided hundreds of labs through every phase of the process described above, from initial workflow assessment through go-live and beyond. If you’re evaluating digital pathology or planning an implementation, we’re happy to walk through your specific situation.
Request a consultation to get started today.
For more resources on the digital pathology transition, explore Lumea’s customer success stories and the Digital Diagnostic Digest, our quarterly publication covering real-world digital pathology implementation.